6 Easy Steps To Install Decorative Wall Panel

Own an empty wall and want to change it into a selfie-corner with some eye-catching design?
No doubt decorative wall paneling would be a great option for you!
Fluted wall paneling is tip-top and has very trendy looks, which are not only price-friendly but also low maintenance required.
We believed it to be the simplest way to add warmth to your interior design.
If you are ready to go, here we would like to share how to DIY decorative paneling and also some great tips generally concerning.
No worries, be happy! Install Wall Panels just easy as ABC!
Step 1: Measurement
Step 2: Cut The Panel Edges
Step 3: Marking
Step 4: Sawing
Step 5: Apply Bonding Agent
Step 6: Stick On Ceiling
How To Install Decorative Wall Panel
Before starting, let’s get ready the tools and materials below:
- Measuring tape
- Cutter
- Hacksaw
- Marker pen
- Ruler
- Bonding agent
- Caulk gun
- Fluted panelling
- Ladder
The first step for installing decorative wall paneling is to remove all unwanted wall plates, outlets, crown moulding, and baseboards.
The wall surface is required to be flat, clean, dry, and dust-free during installation.
Tip: For the best result, please let the paneling get acclimated to the room humidity for at least 24-72 hours before installation.

Step 1: Measurement
Next, we have to measure the height and width of the targeted wall to find its square footage to determine the sheets of fluted panelling needed.
And then divide the wall length by the width of your panel to get the number of sheets you’ll need.
Also read: 15 Impressive Tongue And Groove Outdoor Ceiling Ideas
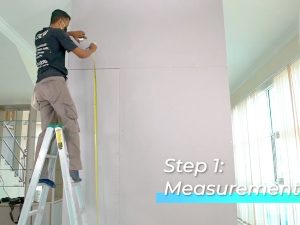
Data accuracy is relatively important here, so please do not forget to mark them down!
Tip: Recommend to add 10 percent to your total measurement to cover up some unforeseen wastage that might occur.
Step 2: Cut The Panel Edges
Once the measurement is captured, you can start to cut and trim the panel edges.
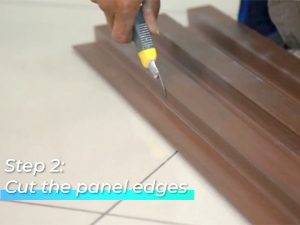
Please always be aware and careful when you are using a cutter to do a trimming job.
Because the trimmed panel edges are so thin and sharp, which might cut your skin easily.
Step 3: Marking
After panel edges are cut, you can proceed with the marking step.
Also read: 7 Reasons People Are Choosing Fluted Panel In Their Home
With the data measured a while ago, you can mark the panel by using a ruler and marker pen.
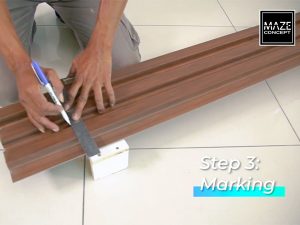
Please remember to mark down the cutouts area for wall plates, outlets, or electrical boxes if needed.
Tips: It’s always recommended to double-check your measurements for outlet location to avoid mistakes.
Step 4: Sawing
Once marking is done, you can use a fine-toothed saw blade to cut the panels into the desired size.
This is to avoid splitting and fraying on the front of the panel.
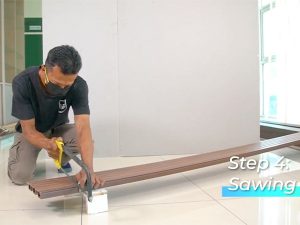
Do make sure to cut openings in the line-up to make the positioning easier later.
This part is quite a body energy-consuming, remember to do it slow and steady!
Tip: All panels should be trimmed 1/8 to 1/4-inch shorter than the ceiling to allow for contraction and expansion under different temperatures.
Step 5: Apply Bonding Agent
It’s important to know that walls are rarely straight.
Also read: Fluted Wall Panel Design Ideas For Your Home (7 Areas)
Below are some tips to ensure the first panel is hung correctly so that the remaining can align nicely.
- With help, position the first panel at one corner of the room, but do not apply panel adhesive yet.
- Check the inside edge of the panel with a level to make sure it is plumb.
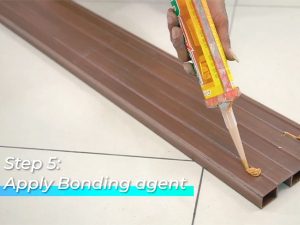
Remember to take the good initiative by numbering the panels to avoid getting confused with the sequences.
You can finally apply adhesive glue with a caulk gun in a “W” or wave pattern.
Never 100% apply adhesive glue on the panels, such a big waste!
Step 6: Stick On Ceiling
Lastly, position and press the fluted panel into place.
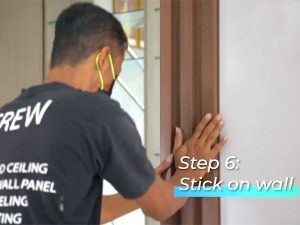
Repeat until targeted walls are fully covered.
Maze Concept Technology & Decorative Wall Panel
Maze Concept is a well-established decorative wood panels for walls & decorative wood panels for ceilings expert in Malaysia.
They offer a wide range of high-quality fluted wood wall panels which make you enjoy the homogeneous wood-looking finishes but skip the hassle of termite attack, with almost no maintenance required along its life span!
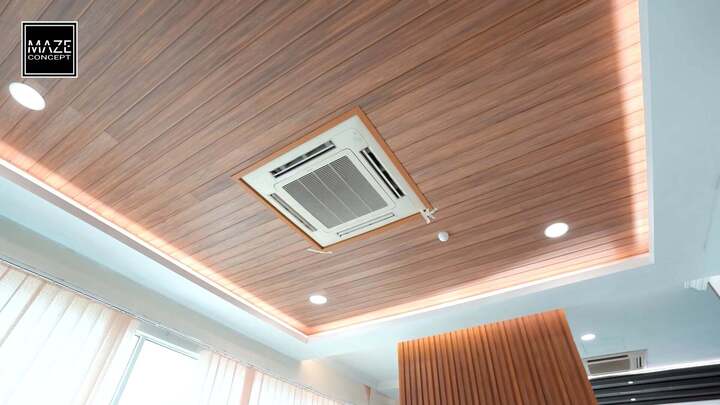
You can always buy the decorative wall panel from Maze Concept and install it yourself.
However, there might be some tricky/ challenging parts if you want to do the car porch or tongue and groove outdoor ceiling.
What to wait?! Contact us or WhatsApp Maze Concept now!

